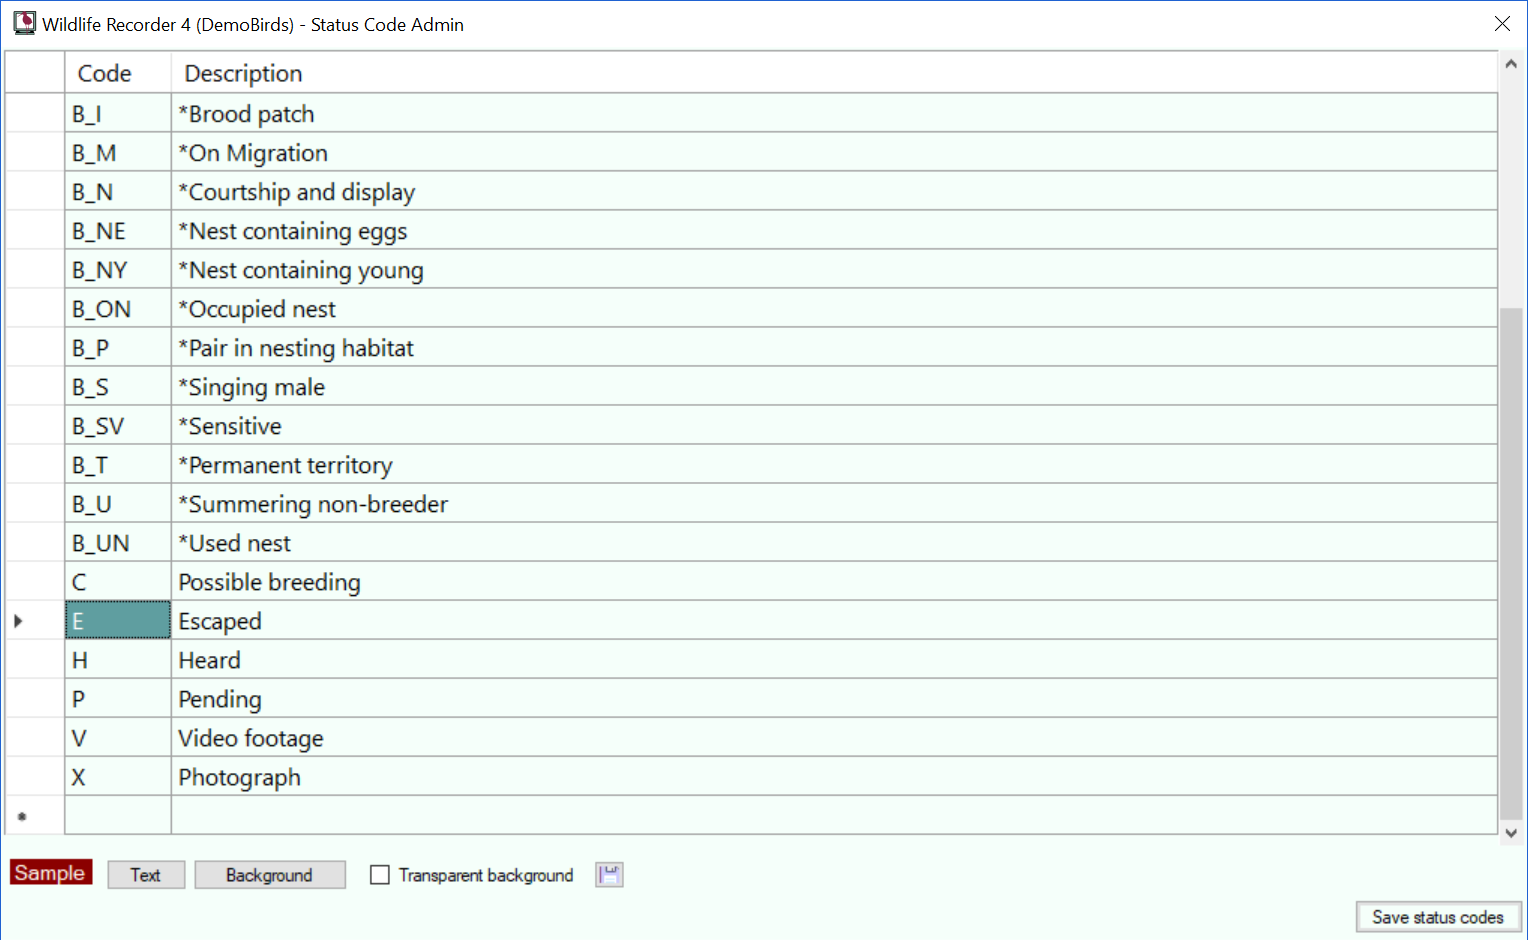
Status Code Administration
This screen allows status codes to be added, edited and deleted. Status code entry is performed by direct entry into the displayed grid. The changes shown in the grid are not committed to the database until the Save Status Codes button is clicked. Changes can be cancelled by closing the form with the ![]() button or by pressing Alt+F4
button or by pressing Alt+F4
Please note that status codes E, P and H are protected and the codes cannot be changed or deleted.
Entering Status Code Data
Position to the cell into which you want to enter data by clicking it or by navigating with the arrow keys start typing to enter your data.
| Status code | Mandatory, can be up to 10 characters long. Duplicate codes are not allowed. |
| Status description | Mandatory, can be up to 50 characters long. |
Foreground and background colours can be associated with particular status codes and will be used to alter the appearance of the sightings display in any display which displays sightings. When a status code row is selected the colour associated with the status code is shown below the grid. You can change the colours by pressing the Text and Background buttons, if you want the background to appear in the same colour as the base grid then click the Transparent background box. Save the changes to the colours by clicking the ![]() button.
button.
Saving the Cell Changes
To save the entered data click press the Enter key or click the mouse in a different row.
Cancel the changes to the row
Press the Esc key to cancel the changes to the current cell. Press Esc again to cancel any other changes made to the row.
Adding a New Status Code
Press Ctrl+N, The cursor will be moved to the status code cell in a new row.
Deleting a Status Code
First select the status code you want to delete by clicking in any cell on the row, ensure the cell is not in edit mode (press the Esc key) then press the Delete key. A warning message will be displayed click the Yes button if you wish to proceed with the deletion.
Saving the changes
The changes shown in the grid are not committed to the database until the Save Status Codes button is clicked. To save the changes to the database click the Save Status Codes or press Ctrl+S on the keyboard.